AndroidICS4.0的文件夹和2.3的文件夹区别比较大,主要区别有:
一、android2.3的文件夹大小是固定的,4.0的文件夹大小是按照里面的元素大小决定的。
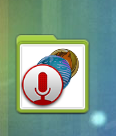
二、android2.3的文件夹图标是固定的文件夹的形式展示的,而4.0是从文件中取前3个的缩略图垂直展示在屏幕上的。估计谷歌怕侵犯苹果文件夹的知识产权,所以没有做成和苹果一样的效果。
三、android2.3的文件中可以放多于16的应用程序的快捷方式,而4.0最多只能放16个快捷方式。
四、android2.3的文件夹中的图标不可以交换位置,而4.0的文件夹中的图标可以相互交换位置。
转载请标明出处:http://blog.csdn.net/wdaming1986/article/details/7748738
对比图如下:
android2.3的文件夹 android4.0的文件夹


下面来看看4.0的代码怎么实现文件夹的:
Step 1:如果系统一开始有fold,一启动launcher的时候,在Launcher.java类中bindFolders回调方法中:
 /**
     * Implementation of the method from LauncherModel.Callbacks.
     */
    public void bindFolders(HashMap<Long, FolderInfo> folders) {
        setLoadOnResume();
        sFolders.clear();
        sFolders.putAll(folders);
    }
绑定所有fold的对象交给sFolders,去处理。
private static HashMap<Long, FolderInfo> sFolders = new HashMap<Long, FolderInfo>();
Step 2:如果是把一个图标拖放到另一图标上面,也形成folder。具体流程如下:
1、首先在workspace中的onDrop()方法中会判断是否会形成一个fold。代码如下:
public void onDrop(DragObject d) {

    ...  ...

    // If the item being dropped is a shortcut and the nearest drop
                // cell also contains a shortcut, then create a folder with the two shortcuts.
                if (!mInScrollArea && createUserFolderIfNecessary(cell, container,
                        dropTargetLayout, mTargetCell, false, d.dragView, null)) {
                    return;
                }

    ... ...
}
2、在Workspace.java类的createUserFolderIfNecessary()方法中来增加fold,具体代码如下:
boolean createUserFolderIfNecessary(View newView, long container, CellLayout target,
            int[] targetCell, boolean external, DragView dragView, Runnable postAnimationRunnable) {

    。。。 。。。
 FolderIcon fi =
                mLauncher.addFolder(target, container, screen, targetCell[0], targetCell[1]);
            destInfo.cellX = -1;
            destInfo.cellY = -1;
            sourceInfo.cellX = -1;
            sourceInfo.cellY = -1;

  。。。 。。。
}
通过mLauncher.addFolder来传递folder的信息,包含一些位置信息绑定哪个屏幕的。
3、在Launcher.java类的addFolder()这个方法是真正形成folder的,以及在launcher的数据库中插入一条信息,代码如下:
 FolderIcon addFolder(CellLayout layout, long container, final int screen, int cellX,
            int cellY) {
        final FolderInfo folderInfo = new FolderInfo();
        folderInfo.title = getText(R.string.folder_name);

        // Update the model
        LauncherModel.addItemToDatabase(Launcher.this, folderInfo, container, screen, cellX, cellY,
                false);
        sFolders.put(folderInfo.id, folderInfo);

        // Create the view
        FolderIcon newFolder =
            FolderIcon.fromXml(R.layout.folder_icon, this, layout, folderInfo, mIconCache);
        mWorkspace.addInScreen(newFolder, container, screen, cellX, cellY, 1, 1,
                isWorkspaceLocked());
        return newFolder;
    }
FolderIcon.fromXml()这个方法是从xml中形成folder,addInScreen(),把相应的信息插入数据库。
4、在FolderIcon.java中fromXml()方法中的代码如下:
static FolderIcon fromXml(int resId, Launcher launcher, ViewGroup group,
            FolderInfo folderInfo, IconCache iconCache) {

        if (INITIAL_ITEM_ANIMATION_DURATION >= DROP_IN_ANIMATION_DURATION) {
            throw new IllegalStateException("DROP_IN_ANIMATION_DURATION must be greater than " +
                    "INITIAL_ITEM_ANIMATION_DURATION, as sequencing of adding first two items " +
                    "is dependent on this");
        }

        FolderIcon icon = (FolderIcon) LayoutInflater.from(launcher).inflate(resId, group, false);

        icon.mFolderName = (BubbleTextView) icon.findViewById(R.id.folder_icon_name);
        icon.mFolderName.setText(folderInfo.title);
        icon.mPreviewBackground = (ImageView) icon.findViewById(R.id.preview_background);

        icon.setTag(folderInfo);
        icon.setOnClickListener(launcher);
        icon.mInfo = folderInfo;
        icon.mLauncher = launcher;
        icon.setContentDescription(String.format(launcher.getString(R.string.folder_name_format),
                folderInfo.title));
        Folder folder = Folder.fromXml(launcher);
        folder.setDragController(launcher.getDragController());
        folder.setFolderIcon(icon);
        folder.bind(folderInfo);
        icon.mFolder = folder;

        icon.mFolderRingAnimator = new FolderRingAnimator(launcher, icon);
        folderInfo.addListener(icon);

        return icon;
    }
Folder folder = Folder.fromXml(launcher);是真正产生了一个folder对象。代码如下:
 /**
     * Creates a new UserFolder, inflated from R.layout.user_folder.
     *
     * @param context The application's context.
     *
     * @return A new UserFolder.
     */
    static Folder fromXml(Context context) {
        return (Folder) LayoutInflater.from(context).inflate(R.layout.user_folder, null);
    }
并且给folder设置拖拽的控制器,绑定folderInfo设置folderInfo.addListener(icon)图标改变的监听。
这个接口 interface FolderListener定义了一个方法---->如下:
   interface FolderListener {
        public void onAdd(ShortcutInfo item);
        public void onRemove(ShortcutInfo item);
        public void onTitleChanged(CharSequence title);
        public void onItemsChanged();
    }
在folder.bind(folderInfo);方法中的操作如下:
    void bind(FolderInfo info) {
        mInfo = info;
        ArrayList<ShortcutInfo> children = info.contents;
        ArrayList<ShortcutInfo> overflow = new ArrayList<ShortcutInfo>();
        setupContentForNumItems(children.size());
        int count = 0;
        for (int i = 0; i < children.size(); i++) {
            ShortcutInfo child = (ShortcutInfo) children.get(i);
            if (!createAndAddShortcut(child)) {
                overflow.add(child);
            } else {
                count++;
            }
        }

        // We rearrange the items in case there are any empty gaps
        setupContentForNumItems(count);

        // If our folder has too many items we prune them from the list. This is an issue
        // when upgrading from the old Folders implementation which could contain an unlimited
        // number of items.
        for (ShortcutInfo item: overflow) {
            mInfo.remove(item);
            LauncherModel.deleteItemFromDatabase(mLauncher, item);
        }

        mItemsInvalidated = true;
        updateTextViewFocus();
        mInfo.addListener(this);

        if (!sDefaultFolderName.contentEquals(mInfo.title)) {
            mFolderName.setText(mInfo.title);
        } else {
            mFolderName.setText("");
        }
    }
主要的操作是:给拖拽进来的快捷方式安排位置,判断Folder是否已经放满,设置监听,设置folder的Name;
5、folder桌面的缩略图怎么形成的,是在第2步Workspace.java的createUserFolderIfNecessary()方法中
// If the dragView is null, we can't animate
            boolean animate = dragView != null;
            if (animate) {
                fi.performCreateAnimation(destInfo, v, sourceInfo, dragView, folderLocation, scale,
                        postAnimationRunnable);
            } else {
                fi.addItem(destInfo);
                fi.addItem(sourceInfo);
            }
fi.performCreateAnimation()这个方法是给folder添加个动画。
6、在FolderIcon.java中的performCreateAnimation()方法中:
 public void performCreateAnimation(final ShortcutInfo destInfo, final View destView,
            final ShortcutInfo srcInfo, final View srcView, Rect dstRect,
            float scaleRelativeToDragLayer, Runnable postAnimationRunnable) {

        Drawable animateDrawable = ((TextView) destView).getCompoundDrawables()[1];
        computePreviewDrawingParams(animateDrawable.getIntrinsicWidth(), destView.getMeasuredWidth());

        // This will animate the dragView (srcView) into the new folder
        onDrop(srcInfo, srcView, dstRect, scaleRelativeToDragLayer, 1, postAnimationRunnable);

        // This will animate the first item from it's position as an icon into its
        // position as the first item in the preview
        animateFirstItem(animateDrawable, INITIAL_ITEM_ANIMATION_DURATION);

        postDelayed(new Runnable() {
            public void run() {
                addItem(destInfo);
            }
        }, INITIAL_ITEM_ANIMATION_DURATION);
    }
computePreviewDrawingParams()这个方法是计算绘制folder图标的方法;
7、在FolderIcon.java类中的computePreviewItemDrawingParams()方法中:
 private PreviewItemDrawingParams computePreviewItemDrawingParams(int index,
            PreviewItemDrawingParams params) {
        index = NUM_ITEMS_IN_PREVIEW - index - 1;
        float r = (index * 1.0f) / (NUM_ITEMS_IN_PREVIEW - 1);
        float scale = (1 - PERSPECTIVE_SCALE_FACTOR * (1 - r));

        float offset = (1 - r) * mMaxPerspectiveShift;
        float scaledSize = scale * mBaselineIconSize;
        float scaleOffsetCorrection = (1 - scale) * mBaselineIconSize;

        // We want to imagine our coordinates from the bottom left, growing up and to the
        // right. This is natural for the x-axis, but for the y-axis, we have to invert things.
        float transY = mAvailableSpaceInPreview - (offset + scaledSize + scaleOffsetCorrection);
        float transX = offset + scaleOffsetCorrection;
        float totalScale = mBaselineIconScale * scale;
        final int overlayAlpha = (int) (80 * (1 - r));

        if (params == null) {
            params = new PreviewItemDrawingParams(transX, transY, totalScale, overlayAlpha);
        } else {
            params.transX = transX;
            params.transY = transY;
            params.scale = totalScale;
            params.overlayAlpha = overlayAlpha;
        }
        return params;
    }
主要工作是:计算图标的排列,每一个相对上一个有点偏移的距离;效果图如下:
以上基本是把Step 2流程大致过了一遍。
Step 3:folder类中的长按事件的传递,以及Fold中长按交换位置的流程过一下:
1、先来说给Folder设置长按监听的地方,因为Folder.java类是继承了View.OnClickListener,
View.OnLongClickListener事件,所以,长按事件就交给自己的onLongClick()事件来处理。
2、所以Folder中的长按事件,被自己的public boolean onLongClick(View v) {}时间捕获,代码如下:
public boolean onLongClick(View v) {

  ...  ...
   mLauncher.getWorkspace().onDragStartedWithItem(v);
            mLauncher.getWorkspace().beginDragShared(v, this);
            mIconDrawable = ((TextView) v).getCompoundDrawables()[1];

            mCurrentDragInfo = item;
            mEmptyCell[0] = item.cellX;
            mEmptyCell[1] = item.cellY;
            mCurrentDragView = v;

            mContent.removeView(mCurrentDragView);
            mInfo.remove(mCurrentDragInfo);
            mDragInProgress = true;
            mItemAddedBackToSelfViaIcon = false;

   ...  ...
}
同样拖拽事件是交给Workspace来处理,最后也是统一交给DragController.java类处理和分发相应的事件。这个过程在
Android-->Launcher拖拽事件详解【androidICS4.0--Launcher系列二】中做了详细的介绍,这里就不做赘述了。
3、主要看Folder.java类中的onDragOver()这个方法,当在文件夹中拖拽到另一个快捷方式的上面的时候,发生交换,
来看代码如下:
 public void onDragOver(DragObject d) {
        float[] r = getDragViewVisualCenter(d.x, d.y, d.xOffset, d.yOffset, d.dragView, null);
        mTargetCell = mContent.findNearestArea((int) r[0], (int) r[1], 1, 1, mTargetCell);
        if (mTargetCell[0] != mPreviousTargetCell[0] || mTargetCell[1] != mPreviousTargetCell[1]) {
            mReorderAlarm.cancelAlarm();
            mReorderAlarm.setOnAlarmListener(mReorderAlarmListener);
            mReorderAlarm.setAlarm(150);
            mPreviousTargetCell[0] = mTargetCell[0];
            mPreviousTargetCell[1] = mTargetCell[1];
        }
    }
这个方法主要做的操作是:判断拖拽的是哪个对象mContent.findNearestArea((int) r[0], (int) r[1], 1, 1, mTargetCell);判断在
哪个目标的附近,然后判断和是否是正在拖拽的对象的坐标,设置mReorderAlarmListener来进行交换,设置150毫秒用来处理动画的。
4、在ReorderAlarmListener内部类的代码如下:
  OnAlarmListener mReorderAlarmListener = new OnAlarmListener() {
        public void onAlarm(Alarm alarm) {
            realTimeReorder(mEmptyCell, mTargetCell);
        }
    };
5、在realTimeReorder()方法中传递这个快捷方式在屏幕x轴,y轴上的为止,进行交换,代码如下:
 private void realTimeReorder(int[] empty, int[] target) {
        boolean wrap;
        int startX;
        int endX;
        int startY;
        int delay = 0;
        float delayAmount = 30;
        if (readingOrderGreaterThan(target, empty)) {
            wrap = empty[0] >= mContent.getCountX() - 1;
            startY = wrap ? empty[1] + 1 : empty[1];
            for (int y = startY; y <= target[1]; y++) {
                startX = y == empty[1] ? empty[0] + 1 : 0;
                endX = y < target[1] ? mContent.getCountX() - 1 : target[0];
                for (int x = startX; x <= endX; x++) {
                    View v = mContent.getChildAt(x,y);
                    if (mContent.animateChildToPosition(v, empty[0], empty[1],
                            REORDER_ANIMATION_DURATION, delay)) {
                        empty[0] = x;
                        empty[1] = y;
                        delay += delayAmount;
                        delayAmount *= 0.9;
                    }
                }
            }
        } else {
            wrap = empty[0] == 0;
            startY = wrap ? empty[1] - 1 : empty[1];
            for (int y = startY; y >= target[1]; y--) {
                startX = y == empty[1] ? empty[0] - 1 : mContent.getCountX() - 1;
                endX = y > target[1] ? 0 : target[0];
                for (int x = startX; x >= endX; x--) {
                    View v = mContent.getChildAt(x,y);
                    if (mContent.animateChildToPosition(v, empty[0], empty[1],
                            REORDER_ANIMATION_DURATION, delay)) {
                        empty[0] = x;
                        empty[1] = y;
                        delay += delayAmount;
                        delayAmount *= 0.9;
                    }
                }
            }
        }
    }
readingOrderGreaterThan()这个方法的作用是判断是从上往下拖动,还是从下往上拖动,这两种情况的交换方式不一样。循环也就不一样。交换的过程中通过animateChildToPosition();这个方法设置了一个动画。
6、在放下的时候会触发Folder.java的onDrop()方法,
 public void onDrop(DragObject d) {
        ShortcutInfo item;

   。。。  。。。
if (d.dragView.hasDrawn()) {
                mLauncher.getDragLayer().animateViewIntoPosition(d.dragView, mCurrentDragView);
            } else {
                mCurrentDragView.setVisibility(VISIBLE);
            }

  mInfo.add(item); 。。。  。。。
}
作用是设置放下的view可见,把当前的这个快捷方式添加到mInfo中。
7、当执行完onDrop()方法后会走onDropCompleted()方法:
public void onDropCompleted(View target, DragObject d, boolean success) {
  ... ...
 // Reordering may have occured, and we need to save the new item locations. We do this once
        // at the end to prevent unnecessary database operations.
        updateItemLocationsInDatabase();
  ...  ...
}
这个方法的作用是更新item的位置信息在数据库中。
private void updateItemLocationsInDatabase() {
        ArrayList<View> list = getItemsInReadingOrder();
        for (int i = 0; i < list.size(); i++) {
            View v = list.get(i);
            ItemInfo info = (ItemInfo) v.getTag();
            LauncherModel.moveItemInDatabase(mLauncher, info, mInfo.id, 0,
                        info.cellX, info.cellY);
        }
    }
好了,folder的大致流程就是这些,更详细的请参考launcher源代码。
写的仓促,欢迎大家指出里面的错误,如果有不解的欢迎留言!
分享到:


相关推荐
android2.3 仿 4.0 launcher,没有wdiget,加入了最近应用程序,和下载的应用,导入压缩包里的jar.tar.gz的3个Jar文件即可
从android4.0源码中考出来的 launcher2的源码,谁需要谁下吧
android 4.0 launcher分析
android4.0 launcher2 源代码
android4.0 launcher源码
android 定制 launcher 源码
android4.0 Launcher源码,压缩文件中含class文件,导入到eclipse后导入class文件就可以运行。
android 4.0 Launcher2 源码
下载后导入eclipse中,可直接运行,如果代码出现红叉叉,请点project-->clean消除,再运行
已经修改过包名的Android 4.0 Launcher 可编译代码 只要加入四个classes.jar 即可编译运行。
android4.0 launcher源码 可直接在Eclipse中运行 与其他launcher不冲突
这是Android4.0中的Launcher源码。要需要者,请下载。
有部分代码已经注释,完美导入Eclipse
本代码是4.0 launcher 源码. 支持4.0 4.1 系统. 真机运行截图见 shoot.png. 如果您遇到麻烦请自己搭建android开发环境:linux系统,虚拟机,下载android源码 等.这将花费有经验的您几天时间. 迅速获得编译技术支持(如果...
压缩包内是原生的android4.0 launcher代码
4.0Launcher的源码,在项目中的library文件中包含了编译所需要的framework_intermediates,android-common_intermediates,core_intermediates的jar文件,项目还整合了android.support.v13.dreams.BasicDream.java这...
本项目是原生的Android 4.0 手机桌面源码 Eclipse版本,已修改包名为Launcher2,不与原来的系统桌面包名冲突。测试一切正常,编码utf-8导入的时候请注意。
launcher源码(ADWlauncher+android4.0原生launcher)
android整个Launcher2模块的应用层源代码,供大家学习。
android4.0中Launcher2源码。